Second Take

Happy Sunday readers! I hope that everyone has been enjoying their weekend, I know I have been! My Blackhawks won last night and are potentially one game away from winning the Stanley Cup again! I sure hope they do so we can take another picture like this one:

IMAG0927

Last Sunday was a very special day for Zach and I…it was our TWO YEAR anniversary! I really can’t believe it has already been two years! It still seems like yester day that this happened…

IMG_0241

followed very quickly by this…

DSC00947

I am a very lucky girl that I got to marry my best friend and he still makes me laugh…even when he is driving me crazy. I also can’t believe that it has been almost a year since I started this blog! I will admit it has been a lot more work than I was expecting and I haven’t been nearly as dedicated as I thought I would be, but I am learning so bear with me!

A lot of things have changed in the past year though…a few weeks ago some friends were going through something and not knowing what else to do I offered to make them dinner, a year ago I was barely willing to offer to make Zach dinner. I turned to two favorites, cheese enchiladas that I will definitely have to share with you guys and my personal favorite tetrazzini. When I was making the tetrazzini I realized how far I have come, from documenting my first time ever making it here on the blog, to practically knowing it by heart and adding my own personal touches.

Now for the new and improved Tetrazzini!

2015-02-18 20.06.18

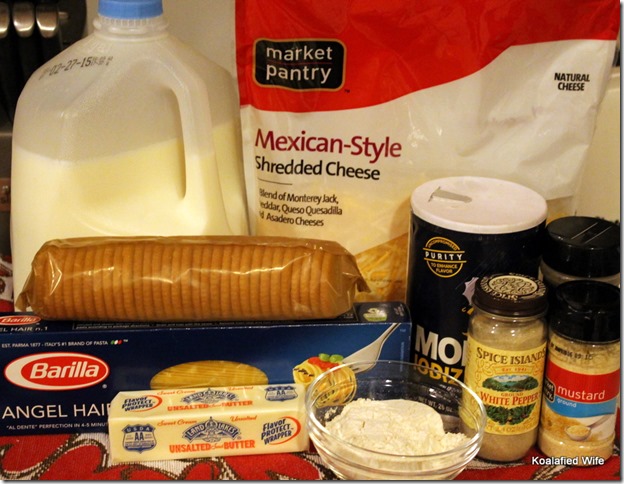
For this recipe you will need Angel Hair pasta, butter, flour, salt, white pepper, poultry seasoning, ground mustard, milk, shredded cheese.

(Optional and not pictured onion and chicken/turkey).

2015-02-18 20.17.102015-02-18 20.18.42

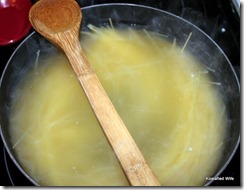
Bring large pot of water to boil. Add pasta and cook for four minutes. Drain.

2015-02-18 20.20.38

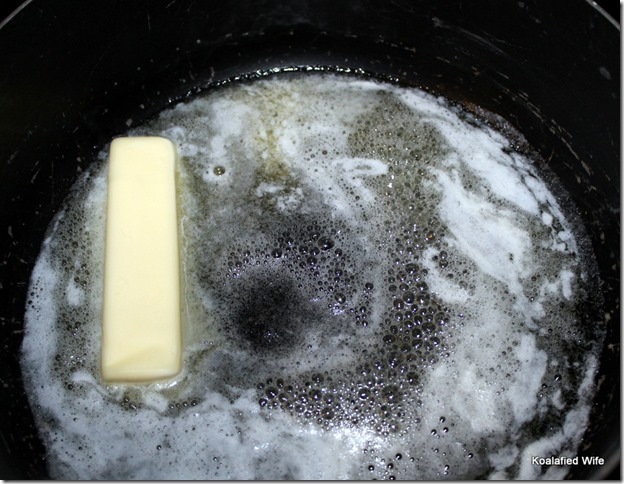
Melt butter in sauce pan over medium heat. If you wish to add onion do so now and cook and stir until tender.

2015-02-18 20.22.15

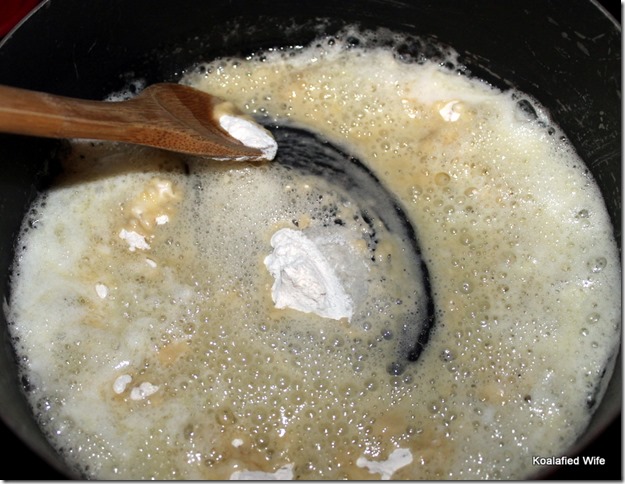
Stir in flour until well blended.

2015-02-18 20.23.40

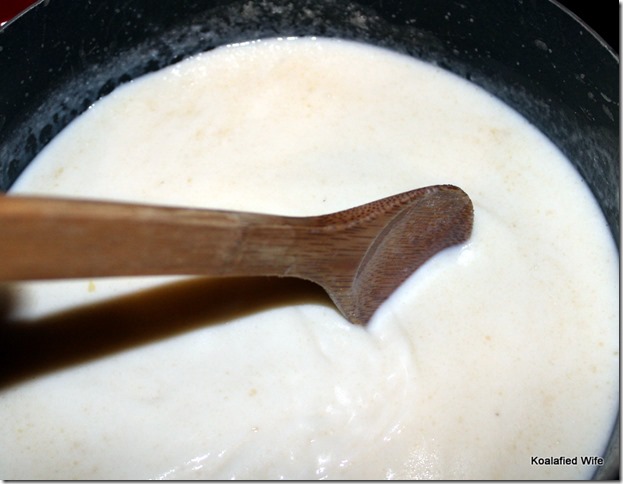
Gradually add milk and stir so no lumps form.

2015-02-18 20.26.07

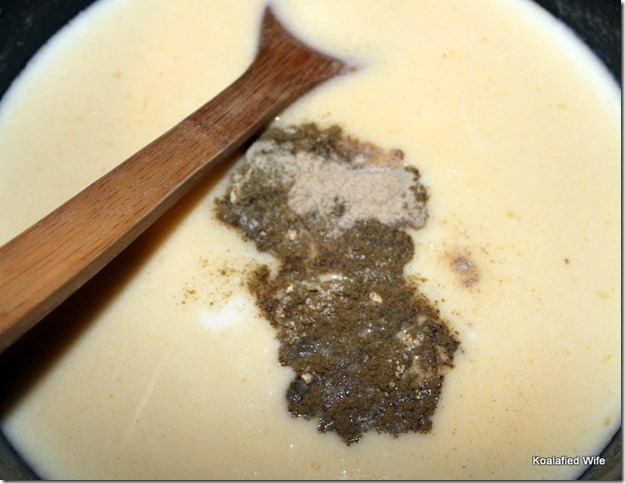
Season with salt, white pepper, poultry seasoning and mustard.

2015-02-18 20.34.102015-02-18 20.34.16

Cook over medium heat, stirring constantly till it thickens.

2015-02-18 20.37.37

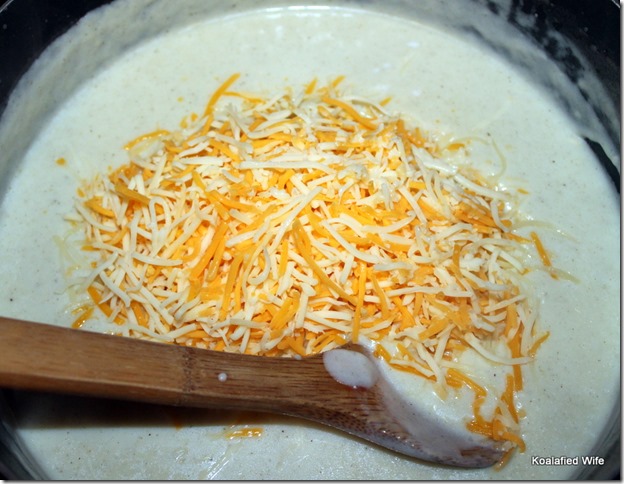
Remove from heat and stir in 1 1/3 cup shredded cheese. Stir until cheese melts.

2015-02-18 20.39.20

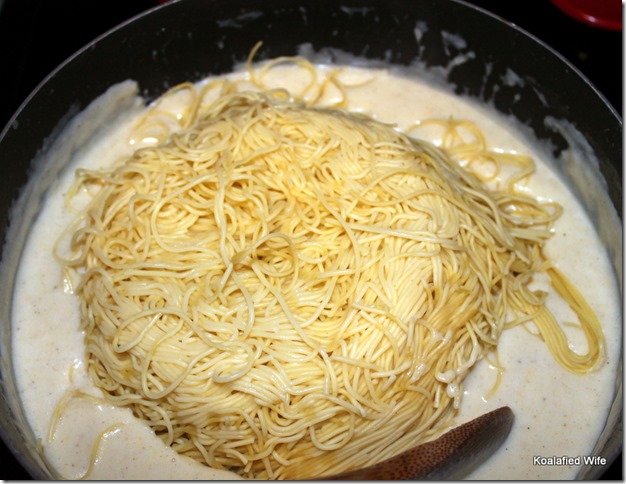
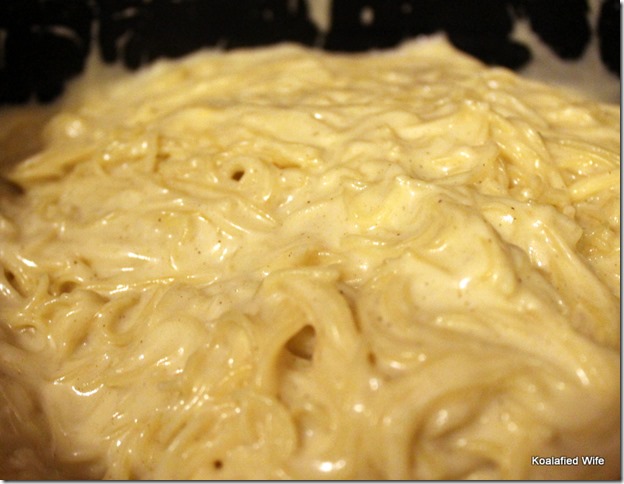
Add cooked pasta to the sauce and stir until noodles are well covered.

2015-02-18 20.41.40

Add meat if desired, I highly recommend using shredded chicken, and stir until well combined.

2015-02-18 20.44.15

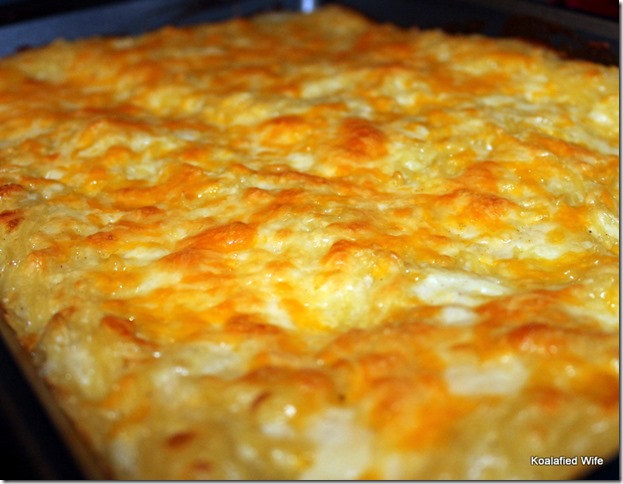
Pour pasta mixture into 9X13 pan and sprinkle with remaining 2/3 cup shredded cheese.

2015-02-18 21.10.52

Bake at 400 for 25 minutes until sauce is bubbly and cheese is toasted.

2015-02-18 21.25.58

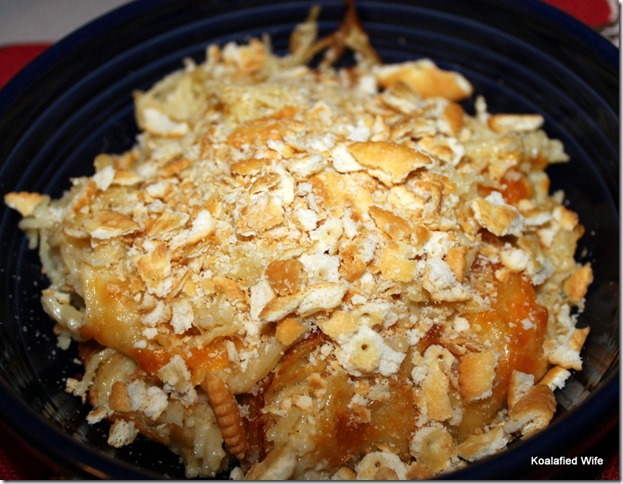
Serve topped with crushed Ritz crackers. Enjoy!

Tetrazzini

  • 1 16oz package Angel Hair pasta
  • 2/3 cup onion, if desired
  • 1/2 cup butter
  • 1/2 cup all purpose flour
  • 2 teaspoon salt
  • 1/2 teaspoon white pepper
  • 1 teaspoon poultry seasoning
  • 1/2 teaspoon ground mustard
  • 4 cup milk
  • 2 cup shredded sharp cheddar or Mexican blend cheese
  • 2 cups cooked, shredded chicken

Preheat oven to 400.

Bring large pot of water to boil. Add pasta and cook for about 4 minutes (until almost tender). Drain.

Melt butter in saucepan over medium heat. Add onion, if desired; cook and stir until tender. Stir in flour until well blended, then gradually add milk and stir so no lumps form. Season with salt, white pepper, poultry seasoning and ground mustard. Cook over medium heat stirring constantly till it thickens. Remove from heat and add 1 1/3 cup of the cheese. Stir until cheese melts.

Stir in pasta and shredded chicken. Place in 9X13 baking dish.  Top with remaining 2/3 cup cheese.

Bake for 25 minutes until sauce is bubbly and cheese is toasted.

Serve topped with crushed Ritz crackers.

I love feeling like I have made this recipe my own over the past year, I love making it and it is great for leftovers!

What is a recipe you have made your own over the years?

2015-05-30 16.53.35

Spring Has Sprung

Hello readers! I don’t know about you guys, but here, the past few days have been beautiful, aside from some random torrential downpours. Randomly this weekend is rainy and 60s but I am still definitely in a spring frame of mind. Although the rainy day has definitely put someone in a napping mood…no joke, she is snoring, it is adorable.

2015-05-30 16.57.12

These other adorable sleepers totally reminded me of her when we went to the Milwaukee Zoo a few weeks ago. (If you haven’t made it to the Milwaukee Zoo yet and you live nearby you must visit it!)

2015-05-12 12.45.102015-05-12 13.26.43

Hopefully you all got a chance to read my guest post on my mother in law’s blog! It was exciting to see my work on someone else’s page, I know the views for my page went way up after it was posted, which was exciting in itself. I know I also enjoyed reading the posts from her other super star bloggers! You should definitely check it out if you haven’t already.

Lately I have been a busy little bee in the kitchen and I have a few recipes to share and an update to an old favorite, but today I am sharing something simple and easy, but it was new for me! Last night I was spending some time with some friends of ours while Zach was at work and I actually offered to help teach my friend Kristina (yes Kristina…and I can’t even make this up…her husband’s name is also Zac) how to cook a few easy things in the kitchen. I seem to have come a long way…from knowing relatively little about cooking to teaching a fellow newlywed kitchen tips and tricks. Although I guess I have been sharing my tips and tricks with you for awhile now.

Today I am talking watermelon! I love watermelon, especially when it is hot outside. a few years ago I was so excited that Target had precut watermelon spears, those are my favorite! I know watermelon is watermelon and the way it is cut has absolutely no impact on the taste, but I can’t seem to resist when it is cut into spears. Last summer Zach and I were wandering around the grocery store and I saw whole watermelon and got into my head that it was time for me to learn how to cut a watermelon.

Now before I get into the fantastic way I found to cut watermelon I must share yet another story. Since I was little I have had a very healthy respect for sharp knives, I wish I could say I have a good reason why I still avoid them, but I don’t, other than they are very sharp and I am terrified of cutting myself. Well to cut the watermelon you know I definitely had to use a BIG knife. I was determined to use our fabulous knifes we got for our wedding and figured this was a good start.

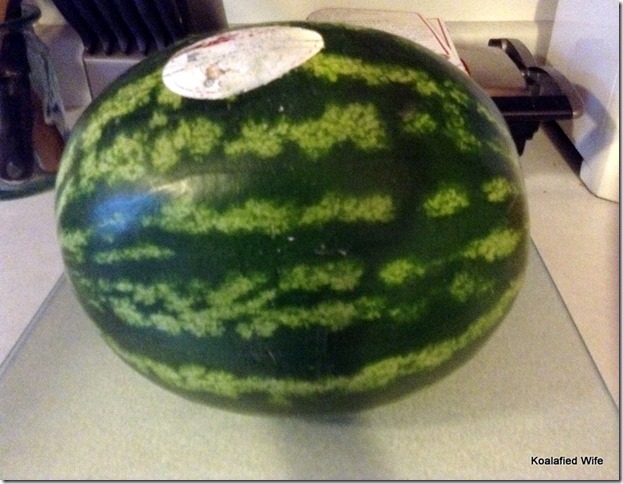
Watermelon 1

Start with a whole watermelon.

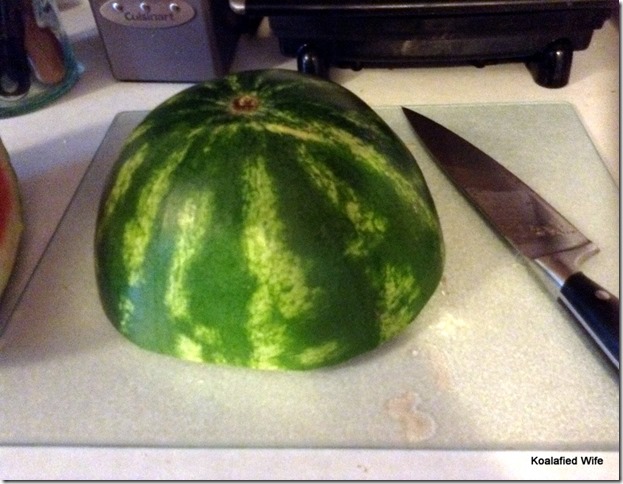
Watermelon 2

Cut in half. (Look at that big knife!)

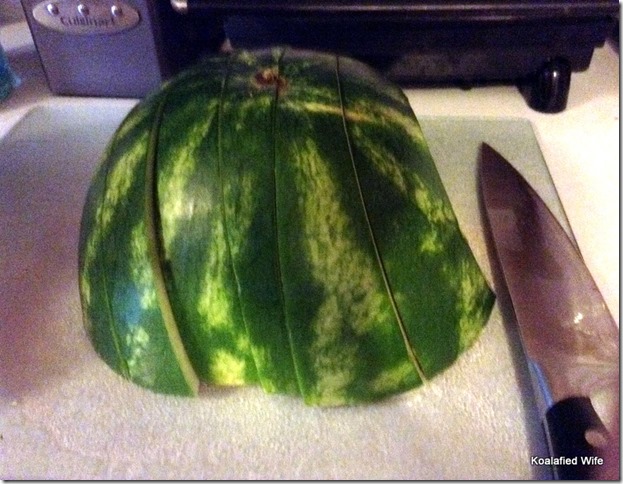
Watermelon 3

Cut watermelon in several rows. Then repeat going the opposite direction.

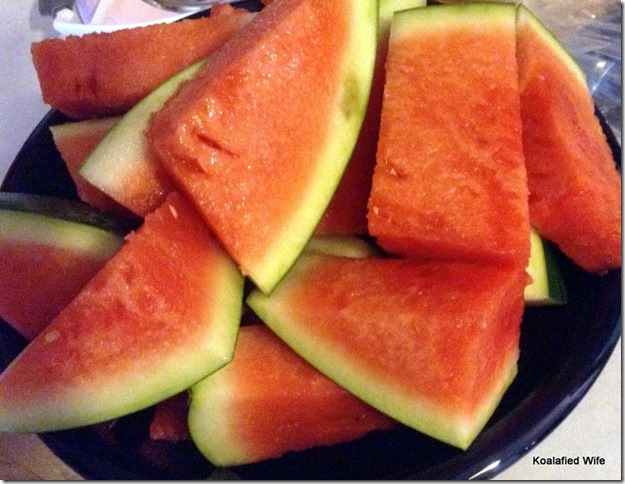
Watermelon 4

Ta-da! I ended up with yummy watermelon spears!

How easy was that? It took me no time at all and now that I have done it I am ready to do it again and again! I have been finding more and more that some of the things I have been avoiding for years aren’t so bad…what have I been waiting for?!

In other news Zach and I officially bought a car and I am so excited! I wanted to sleep in it the night we brought it home, I am in love. I will admit it is very different driving an SUV after driving a Mini Cooper for six years, but it was time for something different and for anyone out there who as been debating getting a Mini I highly recommend it!

In case I haven’t shared enough cute pictures today here’s one more…

2015-02-03 21.19.46

Something New

Hello readers! It has sure been awhile but now that spring actually seems to be here I am ready to get back into things! Zach and I have been a busy pair, working and playing. I keep joking that we are almost real adults, we have been casually looking at houses and in a few weeks the lease on my Mini is up and we have been looking for a more practical car. With the four cars we have owned recently none could comfortably hold more than two passengers, sure the Mini does have a backseat but people can only sit behind me since I have to have my seat pulled all the way up…yay short legs! So the search has been on for an SUV, we think we have decided what SUV we want now we just have to find “the one.” I will admit I am kind of sad to see the Mini go, it was my dream car since BMW rereleased it back in 2000, I am proud of myself for achieving that dream, but on to the next dream.

035

My current Mini (Dorothy) with my first Mini (Bluebell)

In other news, Toews is exactly the same, napping all the time and “helping” me around the house, she’s also very good at taking up an entire side of the bed (usually Zach’s side). I will admit she still cracks me up daily and I can’t imagine our life without her.

Toews1


Lately I have been trying new things around the house and I am way too excited to share this one with you today. I have always had a dislike of cooking meat, in fact I avoid it pretty much all together. I kind of joke with Zach that when I am cooking we are vegetarians because I avoid cooking meat as often as possible. Sure I can make tacos with some browned ground beef, and I will gladly heat up the pre cooked meats you can buy at the grocery store, but I have stayed away from raw meat, I always worry that I wont cook it correctly and make us sick.

Well a few weeks ago my mother in law asked me to guest post on her blog, MaryFranSays, she is having Sweeps Week and is featuring 5 guest bloggers. I was so excited she asked me and I got to work figuring out which recipe I wanted to showcase for her readers. After a lot of thought and some input from her, I landed on an old favorite, the only problem I would have to make shredded chicken, it seemed I was going to have to get over my aversion to cooking raw meat. Well the good news is, I DID IT!! and it actually turned out really well and now that I know how easy it is I will be using this recipe many times over, seriously you can use it for just about anything that requires shredded chicken or create your own recipes!

2015-05-23 14.01.38

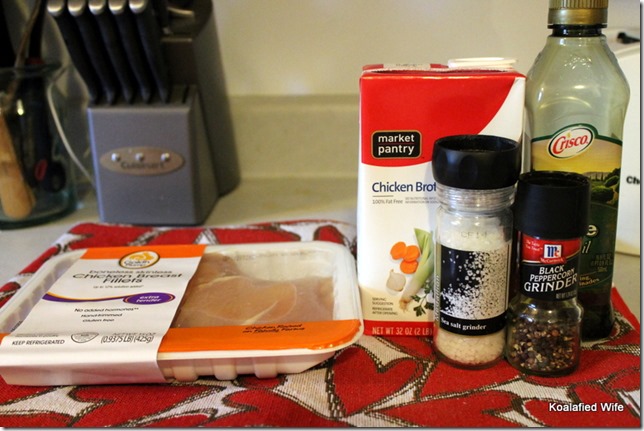
For this recipe you will need olive oil, chicken breasts, salt, pepper and chicken broth or water.

2015-05-23 14.06.25

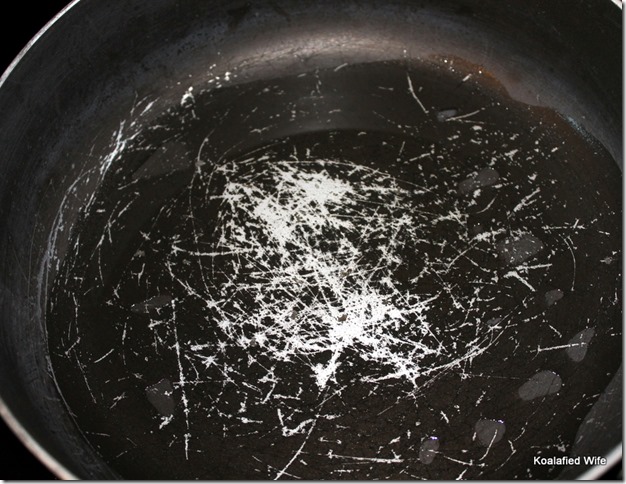
Pour some olive oil into a nonstick skillet, I used about enough to cover the bottom of the pan.

If desired you may season the chicken with salt and pepper prior to the next step, I did not because of what I was going to use them for, your call if you want to.

2015-05-23 14.26.48

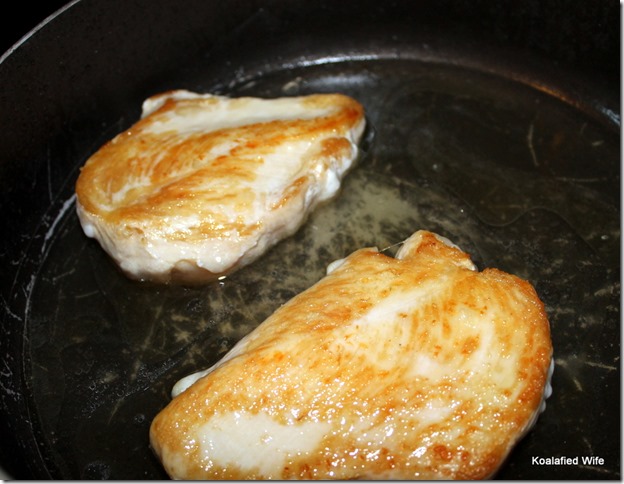
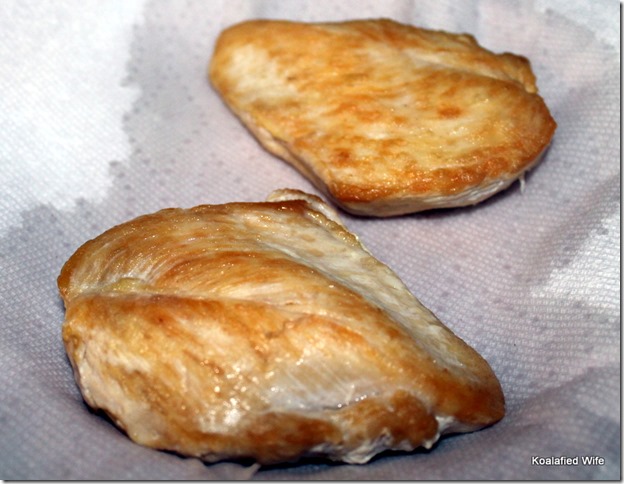
When the oil is hot enough pace the chicken breasts into the pan, top facing down and let cook for 5 min until golden brown on top.

2015-05-23 14.33.04

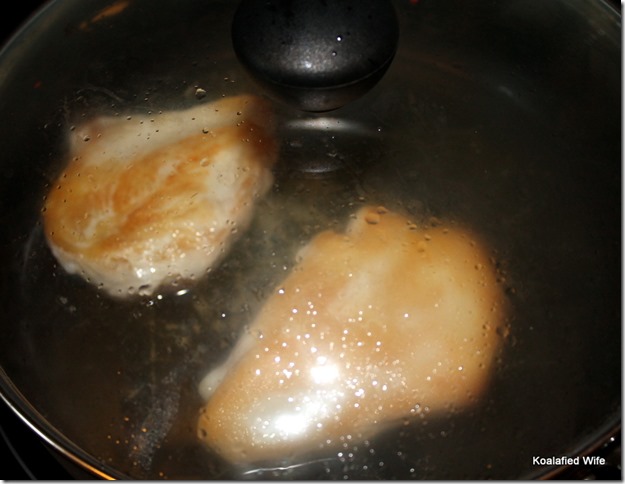
Flip the chicken and add the chicken broth or water.

2015-05-23 14.33.09

Cover the pan and let the chicken simmer over medium heat for 7-10 minutes or until chicken is cooked through. While simmering add additional liquid as needed 1/4 cup at a time if evaporates too quickly.

2015-05-23 15.55.43

Let cool slightly.

2015-05-23 15.55.57

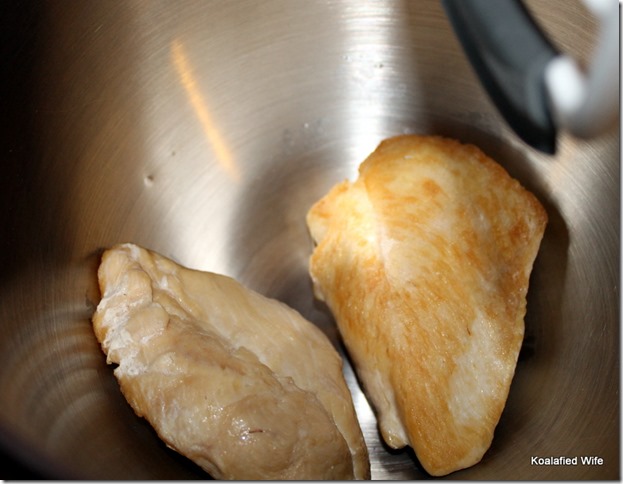
Place chicken breasts into mixer with paddle attachment, turn on, it will thunk around for a few seconds then shred nicely.

2015-05-23 15.57.25

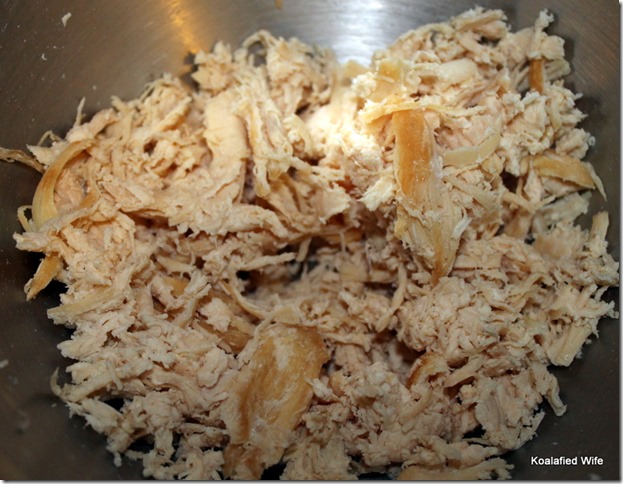
Tada! Look at that beautifully shredded chicken! I made that!

Easy Shredded Chicken

(Two breasts make about 2 cups)

  • Olive oil
  • 2 (about a pound) Boneless skinless chicken breasts
  • Salt & Pepper
  • 3/4 cup chicken broth or water

In a large nonstick pan with a lid, heat enough olive oil to cover the bottom of the pan over medium heat until hot and rippling. Pat the chicken dry and season with salt and pepper on both sides if desired.

Place chicken top facing down in the hot pan and let the chicken cook for 5 minutes until golden brown.

Flip the chicken over, add chicken broth or water, cover the pan and let chicken simmer over medium heat for 7-10 minutes until chicken is cooked through. While chicken is simmering add additional liquid 1/4 cup at a time as needed if liquid evaporates too quickly.

Let chicken cool slightly before shredding. Place chicken breasts into bowl of mixer, using paddle attachment, turn mixer on medium speed. The breasts will thunk around for a minute then will shred nicely. I actually walked away for a minute or so to let it shred.

Use immediately in any desired recipe or it will keep in the refrigerator, well covered, for up to 3 days or can be frozen for up to 2 months.

Enjoy! This chicken was too easy to make and is super versatile.

Now that I shared my newfound excitement for shredded chicken you must check out my mother in law’s blog on Thursday to see how I used it, the recipe is one of my absolute favorites and now that I know how easy shredded chicken is I am so pumped. Check out her blog by clicking here or visit marylamphere.com to read more. Check out the other guest bloggers that will be posting all week starting today!

10 Day You Challenge – Ten“Secrets”

Happy New Year everyone! I hope everyone had a wonderful holiday season! There are so many things that I can’t wait to share with you that have been going on since I last blogged, for one I got an awesome giant mini cupcake pan…seriously it makes 48 at a time and I am already planning an awesome recipe to share for next week using it!

To start the year I figured I would do the 10 Day You Challenge. I will take a few posts over the next year to cover this challenge, hopefully this will help you guys get to know me! Please feel free to share in the comments so that I can get to know all of you! I found this challenge on a blog I follow, Peanut Butter Fingers.

2014-06-10 22.48.12

This first week is hard for me, I don’t really keep secrets so I decided that my “secrets” will be facts about me.

  1. I was born in California but moved to Illinois when I was about 2. This is a recent photo of the hospital I was born at.091
  2. I helped fund the Veronica Mars Movie through Kickstarter. One of my favorite experiences so far, the updates alone were worth it! Not to mention I got a movie poster signed by the entire cast including Kristen Bell!2014-03-06 00.38.55
  3. Zach and I met Kris Versteeg & Marion Hossa of the Chicago Blackhawks in our hotel when we were in at Spring Training in Arizona in 2010, the year we won The Cup! (The first time we had Versteeg.) True story we recognized Versteeg not the super star Marion Hossa…P1000686 
  4. I got to feed a giraffe when we went to the Indy Zoo. How cool is that!? Look at how close you get!IMG_0354 
  5. Zach rescued a duck a few years ago, he lived with us for a few days until we could take him to a wild animal shelter. We named him Joey after Joey on friends because he had a duck.IMG_0179 
  6. My Mother in law and I teamed up for Zach’s fantasy football league last year and we won! Thanks Peyton Manning! We were the Corgiville Koalas. I made it into the playoffs in both my leagues this year but didn’t win…I needed my lucky partner!corgivillekoalas copy
  7. I have never colored my hair, it is all natural greys and all. (Yes I have greys, I have had greys since I was about 12.)P1000612 
  8. I am such a homebody, I would take a night at home with Zach and Toews any day over just about anything else.089 
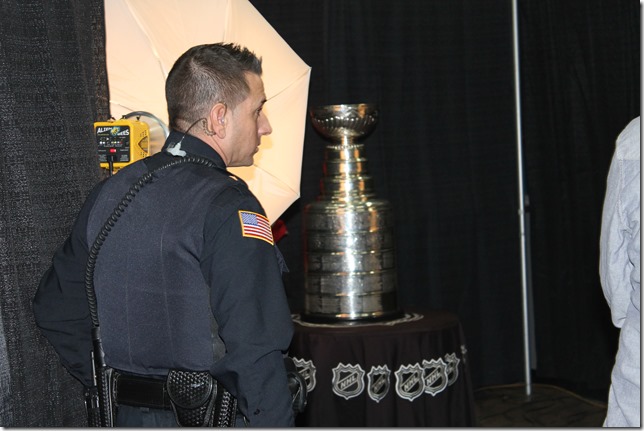
  9. We got to see the Stanley Cup in person after the Blackhawks won the cup in 2013!Stanley Cup 2
  10. Zach and I got married the same day he proposed – There was actually only like a 20 min window between the two events. IMG_0241DSC00949

Now that I have shared some facts about me, tell me something about you!

Another Year Goes By

Hope everyone had a wonderful Thanksgiving! There are so many things I am thankful for this year, most importantly I am thankful for my little family. Last night I was so frustrated and Zach really couldn’t have been sweeter, he wanted to do whatever I needed to make me feel better. Who would have thought the perfect thing would be to take me to his friend’s bakery and have me help make doughnuts? Apparently Zach and it worked. There are so many little things he does for me all the time that make me smile, I am so grateful to have him in my life.
Well all this gushing about my husband has a reason, today is the eleven year anniversary of when we started dating! I will never forget the feeling I had when Zach and I first started hanging out, I knew there was something different about him. He truly is my best friend and at the end of the day I am grateful we have gone through all we have because it brought us to where we are today.

2-10-04 2

Our anniversary is not the only thing that I am excited about though, recently I was inspired by Chobani, only my absolute favorite yogurt company. They have a new project, #MadeWithChobani. I will admit , I was so excited, I LOVE Chobani yogurt, I eat it almost everyday. I immediately started flipping through my recipes deciding what to make. I had so many ideas, but one in particular jumped out at me.

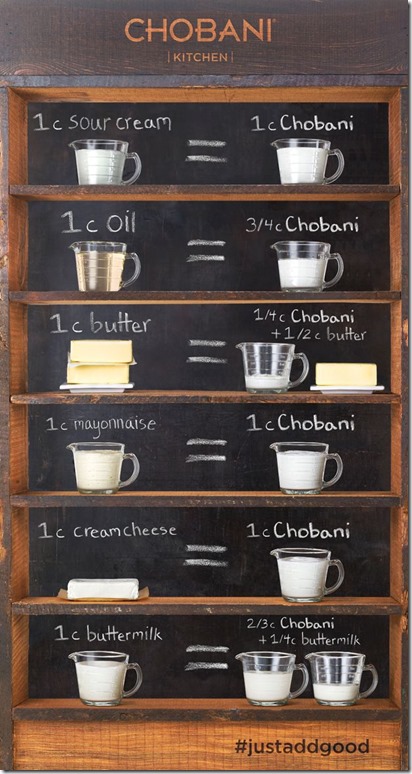
Chobani plain Greek yogurt can be used to substitute many ingredients in cooking and baking, and even as an enthusiastic eater of Greek yogurt I hadn’t really tried substituting so I knew this was the perfect opportunity.

ec7ecb1517f6f56a17fef62c895a3b81

(Source)

I have one dish that I make for every occasion, Christmas, Thanksgiving, football, just because, and it never fails that someone asks for the recipe, loaded baked potato dip. I can’t begin to tell you how easy and delicious this recipe is, 5 ingredients, that’s it. one of the main ingredients is sour cream, since I have recently discovered how delicious plain Greek yogurt is as sour cream I knew it would be a perfect fit for this recipe.

Loaded Baked Potato Dip 1

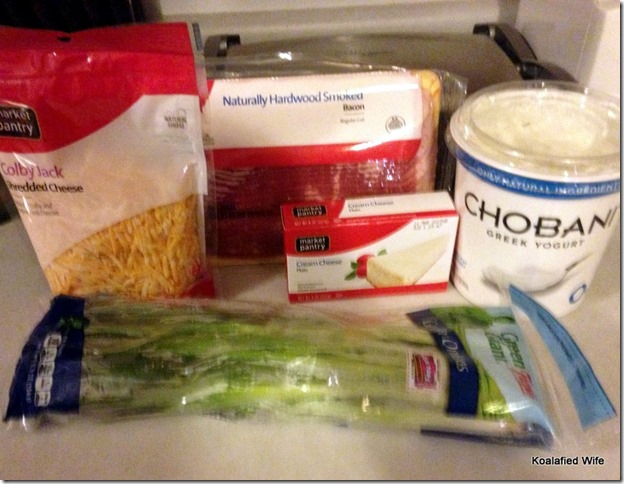
For this recipe you will need Greek Yogurt, cream cheese, bacon, cheese and green onions.

Loaded Baked Potato Dip 6

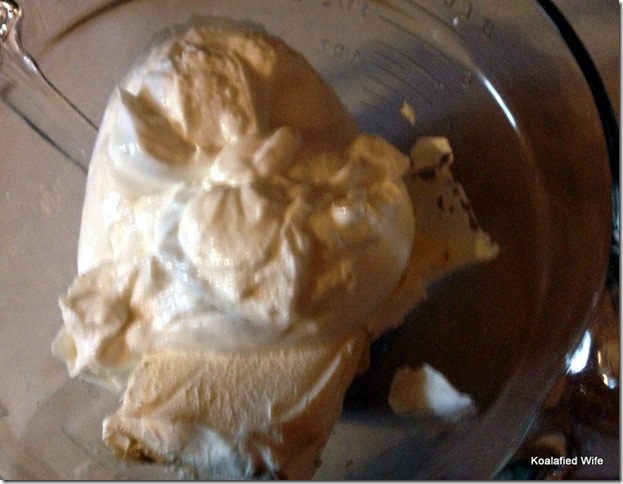
First you combine the Greek yogurt and cream cheese.

Loaded Baked Potato Dip 7

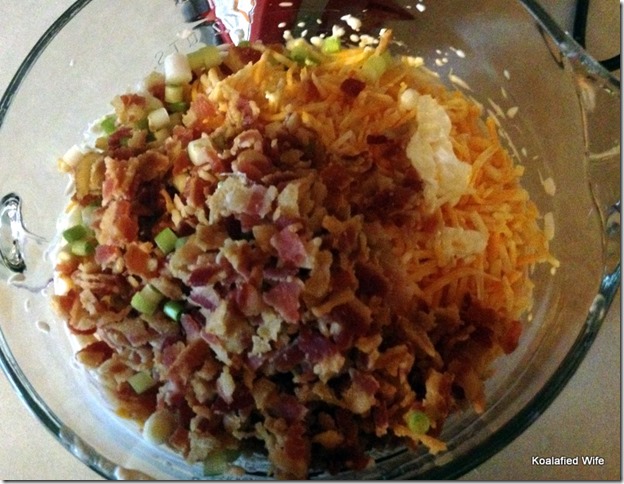
Then you add in the bacon, cheese and green onions.

Loaded Baked Potato Dip 8

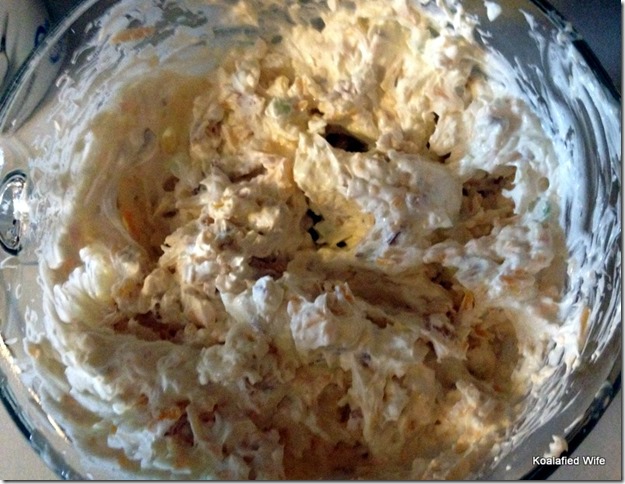
Mix everything together. I always use my hand mixer for this recipe, it makes it that much easier.

Loaded Baked Potato Dip 9

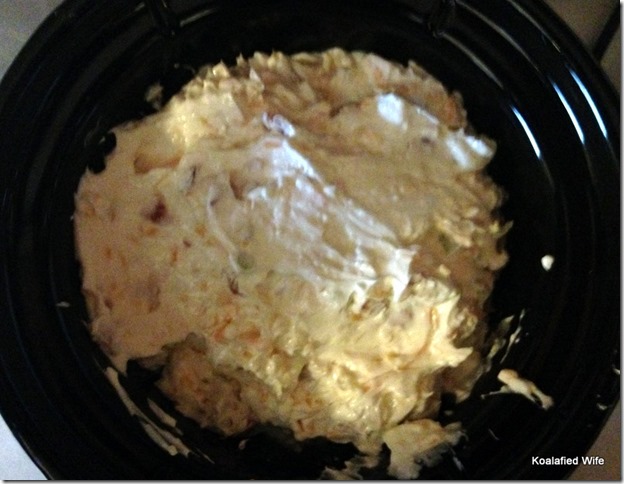
Put it all in a small crockpot and let it heat up.

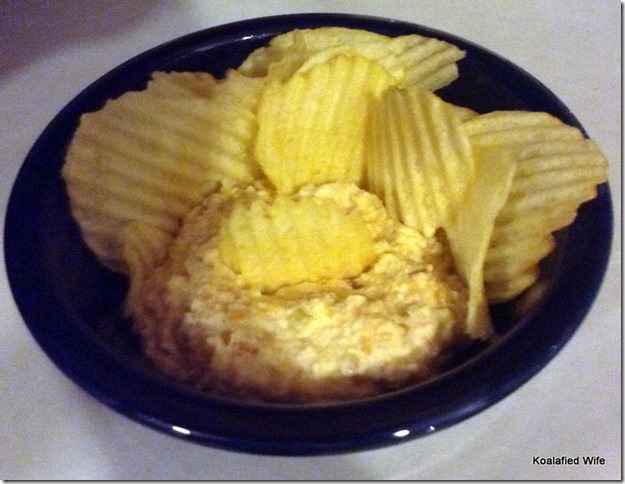
2014-11-29 20.24.05

Serve with chips, crackers or pretzels and enjoy!

Loaded Baked Potato Dip

  • 16oz Chobani Greek yogurt
  • 2 (8oz) bricks cream cheese, softened
  • 2 cups shredded cheddar or Colby Jack cheese
  • 6oz bacon
  • 6-7 green onions chopped

Combine Greek yogurt and cream cheese. Once thoroughly combined add in cheese, bacon and onion and mix well. Place in crockpot and warm.

Serve with potato chips, crackers or pretzels. Enjoy!

Now you see, this dip could not be easier! This was my first time making the dip with Chobani instead of sour cream and I could not tell a difference. It made me feel so much better knowing the dip was made with Greek yogurt, I didn’t feel nearly as guilty when I ate a whole bunch of it. So even those of you out there that aren’t really fans of Greek yogurt try substituting Greek yogurt for sour cream or butter in a recipe and see if you can tell a difference, I sure couldn’t!

I want to say a big thank you to Chobani for inspiring me with their project #MadeWithChobani, as a relatively new blogger I am learning as I go and they inspired me so much with #MadeWithChobani!

Just to clarify though all my thoughts on Chobani are completely my own and I am not being compensated to say these things, I just really love Chobani!

26 Years Later

Mid November is pretty important for our little family, four years ago on November 11 someone special came to live with us, our kitty Toews!

076

When we think back about how much things have changed it makes us laugh a little bit, the first night we had her, she would not leave my side now its her house and she just lets us live here. From time to time I look back at all the photos we have of her and its so weird to see how much she really has changed, when we first got her she was so skinny and stayed that way for awhile, we were worried she wasn’t eating enough, then we got her fixed and we no longer worry if she is eating enough. It is weird to me because both Zach and I feel like we can’t remember what it was like before we had our little troublemaker, she is so much a part of our life.

2014-06-24 22.54.46

Toews is not the only reason Mid November is important to our little family, it is also Zach’s Birthday! So this year I have been baking something special to celebrate birthdays, I knew what I was going to make for Zach before I even started this blog, Funfetti Cupcakes from scratch! I also got up at 6:30am to bake him Jiffy blueberry muffins because they are his favorite. Nothing says ‘I Love You’ like 6:30 in the morning, especially from me, I am not a morning person, but it was worth it for my hubby!

2013-11-11 14.40.49


I know I have mentioned it before but Zach is the King of surprises, you have to wake up pretty early (literally) to get a surprise on him though. He did wake up before I had even put the muffins in the oven but he was good and didn’t peek before they were done, even though I am sure he knew exactly what I was making him. His friend Eric really did get a surprise on him, he built him his own double Kool-Aid tap, seriously, it’s actually pretty awesome and Zach loves Kool-Aid so he was super excited.

Anyway on to the yummy stuff cupcakes!

Funfetti Cupcakes 1

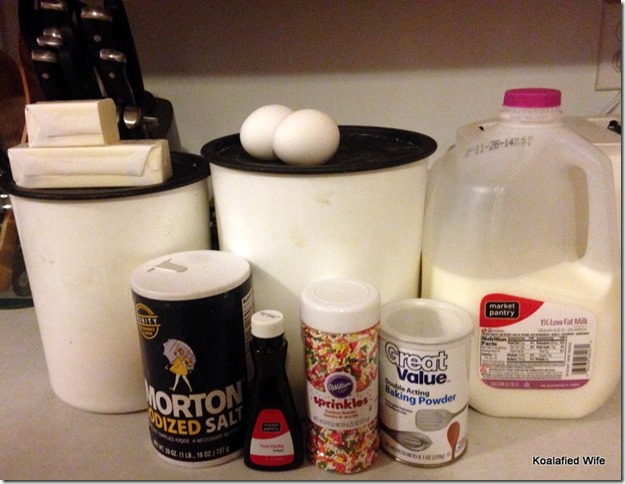
For this recipe you will need flour, baking powder, salt, eggs, sugar, butter, vanilla, milk and sprinkles.

Funfetti Cupcakes 2

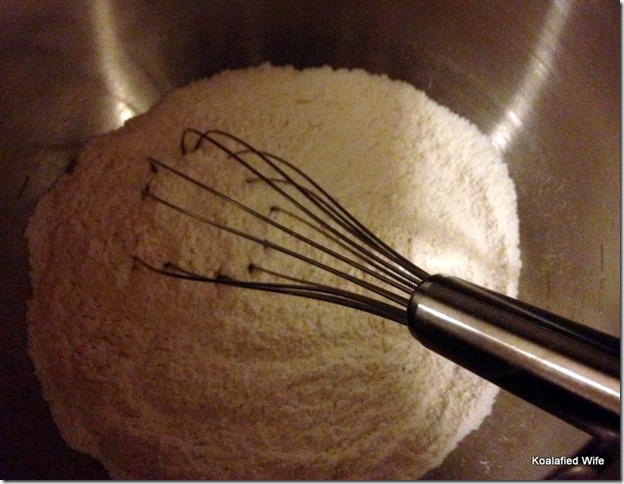
Whisk flour, baking powder and salt in a medium bowl.

Funfetti Cupcakes 4

Beat eggs and sugar in a stand mixer with paddle attachment until light and foamy. (Approximately 2 minutes)

Funfetti Cupcakes 8

While beating slowly pour in melted butter then vanilla.

Funfetti Cupcakes 12

While mixing add half the dry ingredients, then add all the milk and finally the rest of the dry ingredients. Do Not Over Mix!

Funfetti Cupcakes 13

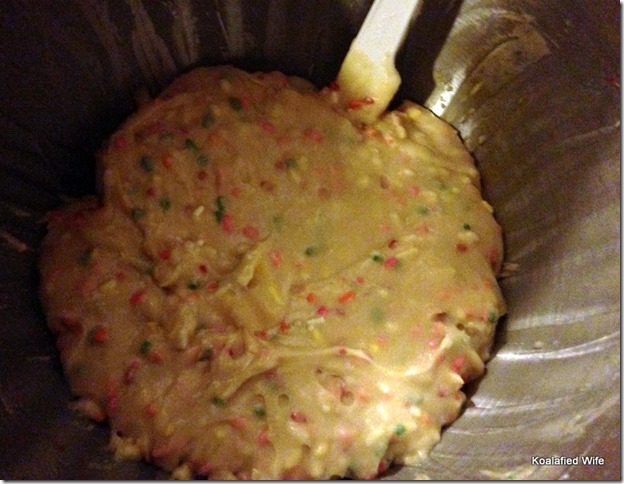
Gently fold in sprinkles.

Funfetti Cupcakes 17

Pour into cupcake pan. I added more sprinkles to most because Zach doesn’t like frosting and I wanted them to look more colorful.

Funfetti Cupcakes 18

Bake 20-25 minutes. you may frost them after they have completely cooled. My chocolate frosting would be fantastic with these cupcakes!

Funfetti Cupcakes 19

Enjoy!

Funfetti Cupcakes

  • 1 1/2 cup flour
  • 1 1/2 teaspoon baking powder
  • 1/4 teaspoon salt
  • 2 large eggs
  • 2/3 cup sugar
  • 3/4 cup butter, melted
  • 2 teaspoons vanilla
  • 1/2 cup milk
  • 1/2 cup sprinkles

Preheat oven to 350. Grease or line cupcake pan.

Whisk together flour, baking powder and salt in a medium bowl.

Beat eggs and sugar in a stand mixer with the paddle attachment until light and foamy (for about 2 minutes). While beating slowly pour in melted butter then vanilla.

While mixing add 1/2 the dry ingredients then add all the milk and finally the remaining dry ingredients. Do Not Over Mix! Gently fold in sprinkles.

Pour batter into cupcake pan. Add additional sprinkles if desired. Bake 20-25 minutes. Allow cupcakes to cool completely before frosting if desired, check out this post if you are looking for frosting recipes.

Happy Birthday Zach!

Football Dip

Our Sundays are dominated by Football during the fall and winter. Somehow I was wrangled into being in two fantasy football leagues, which is nothing compared to Zach’s four or my co-worker’s six. This season has been pretty brutal as a Bears fan, still not a single win at Soldier Field this season. Tomorrow they are at Lambeau and Cutler just can’t seem to win there…but I haven’t lost hope…yet. Martellus Bennett is totally my favorite player and this year he is awesome, I keep replaying that awesome touchdown catch he had a few weeks ago. My fantasy site apparently has a sense of humor because the mentioned that “Not only is Bennett a gifted YouTube rapper.” Seriously look it up…he raps about Capitan Crunch…its awesome.

Most weekends we watch the Bears games at Zach’s parents’ house and Mary makes some awesome football foods. Someday when I attempt to make them I will share the delicious recipes with you, or maybe I will talk Mary into doing a guest post to share them herself! With the Bears playing like they have been the food tends to be my favorite thing about the game so I have been inspired to find a new yummy recipe to contribute.

This past weekend I made an amazing discovery, one of my new favorite football foods. We all know by now I am a big fan of easy recipes, This recipe doesn’t get too much easier, three ingredients and just minutes to make. Since the Bears had a bye last week I figured it was the perfect weekend to experiment with a new recipe, I had pinned this recipe on Pinterest ages ago and as I was browsing it caught my eye again. Well when the recipe turned out delicious I knew I had to share it before football Sunday!

Cheesy Chili Dip 1

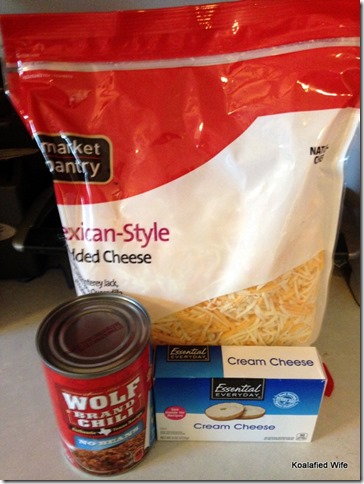
For this recipe you will need cream cheese, chili and shredded cheese.

Cheesy Chili Dip 2

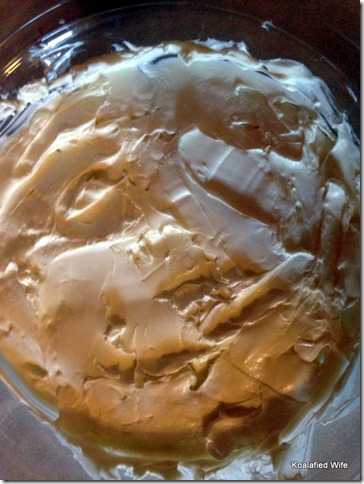
Spread the softened cream cheese evenly in the bottom of your dish. If you need to soften it put it in the microwave for about 30 seconds to soften it up.

Cheesy Chili Dip 3

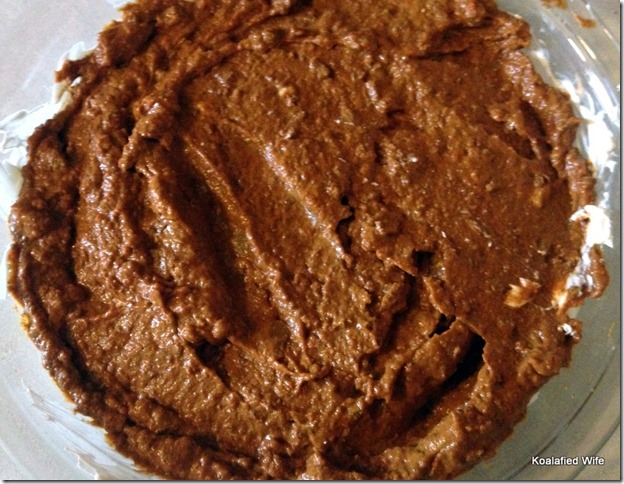
Cover the cream cheese with chili.

Cheesy Chili Dip 4

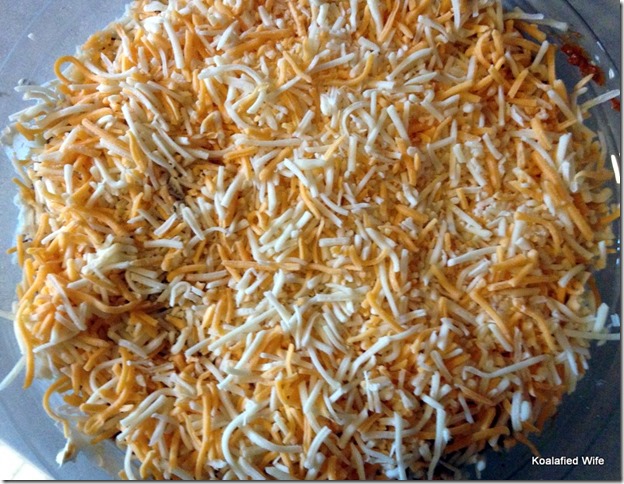
Sprinkle shredded cheese evenly on top.

Cheesy Chili Dip 6

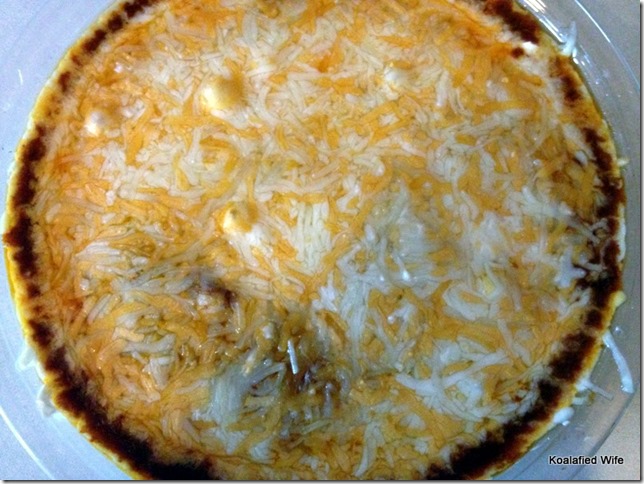
Warm up until cheese is melted. Enjoy! You can eat with tortilla chips or crackers.

Cheesy Chili Dip

  • 8oz cream cheese, softened
  • 15oz can of chili
  • 2 cups shredded cheese

Evenly spread softened cream cheese into the bottom of an ungreased baking dish. Cover with chili and top with shredded cheese.

Microwave on high for 4 minutes, if cheese isn’t completely melted microwave 1-2 more minutes.

When I reheated the dip I did it in my countertop oven and I actually thought it made it that much better. If you want to bake it I would preheat the oven to 350 and let the dip bake for about 5-10 minutes, checking until cheese is melted.

Serve with tortilla chips or crackers.

You know that I can’t help but share a photo of my silly kitty, she was “helping” me write this post.

2014-11-08 18.25.58


Go Bears! Let’s go up to Green Bay and show those Packers how it’s done!

Just My Cup of Tea

It is officially cold. Sure we have had cold days this fall already but now the hope of a warm day here or there is slowly slipping away. Don’t get me wrong, I like fall, I get to pull out my comfy hoodies and my boots, (I LOVE my boots), throw my heated blanket on the bed to snuggle in, drink yummy warm drinks, bring it on! What I do not like about it is that it means inevitably the bitter cold and snow of winter is coming, I like snow for a white Christmas and Zach and my annual snowball fight, but after that I am done with it, I hate driving in the snow!

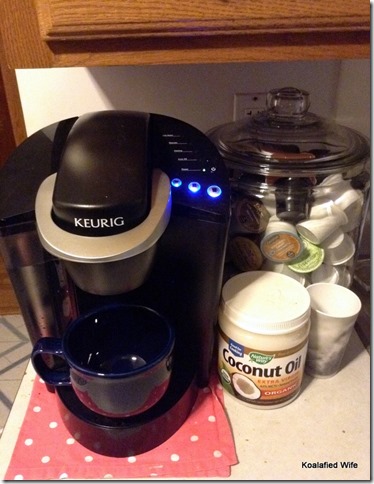
This crisp fall weather makes me crave my favorite warm drinks. Growing up one of my favorite winter drinks was peppermint tea, but I never really branched out to try other flavors. When Zach and I got married his sister generously gave us a Keurig, let me tell you that thing has been so worth it, I use it all the time. Well after we got it, I wanted to try all kinds of yummy warm drinks and found some great deals and started trying all kinds of teas. Which brings me to my before mentioned love of chai lattes, I am still trying lots of different varieties of teas and loving most of them.

Keurig 

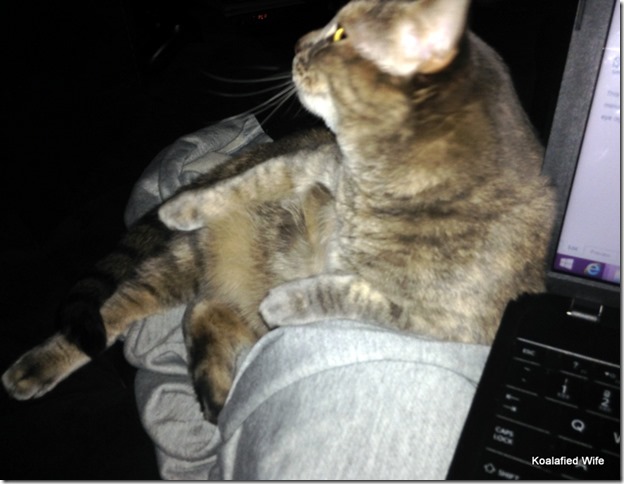
When Keurig first came out a few years ago Zach’s parents got one and loved it so much they bought one for the family store. Well a few weeks ago Zach mentioned that the Store’s Keurig had stopped working and was only giving tiny cups of coffee, he said they were going to throw it away. When I heard that I said no way, it just needs to be cleaned, so Zach brought it home for me to take a crack at. Last week while we were kitty sitting Zach’s parents’ troublemaker Steeger, I took the “broken” Keurig to their house to clean, Steeger “helped”. Clearly when I say helped I really mean rolled around on the floor and played with my awesome bag that I carried the Keurig in.

2014-10-22 12.58.46

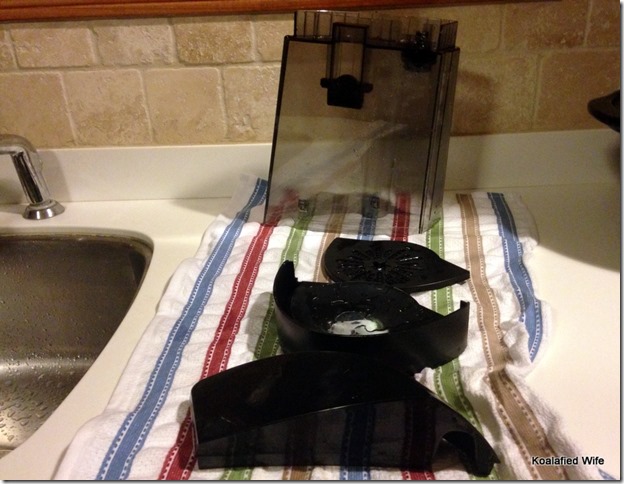
Cleaning a Keurig is really very easy, I was actually pretty surprised, it really mostly took time. The supplies you will need are dish soap, water, vinegar and a straightened paperclip. To start things off I filled a sink full with soap and water and soaked the reservoir tank and lid and the drip tray and cover, let me tell you the drip tray needed it. These parts of the Keurig are dishwasher safe however I opted to let them soak instead. I do run our drip tray through the dishwasher every once in awhile to keep it clean so I do know for a fact they are dishwasher safe, however if you keep them clean you wont need to soak them at all. Make sure that you do clean the reservoir tank though, it can get some build up at the bottom.

Keurig 2

While the pieces were drying I took my straightened paperclip and cleaned all the clogs from the K-Cup holder. I cleaned both needles and the area directly above the cup where the liquid comes out. Once the pieces had dried and I had gotten rid of all the dried on gunk, I put the Keurig back together, it was time to get started with the real cleaning!

Keurig 3

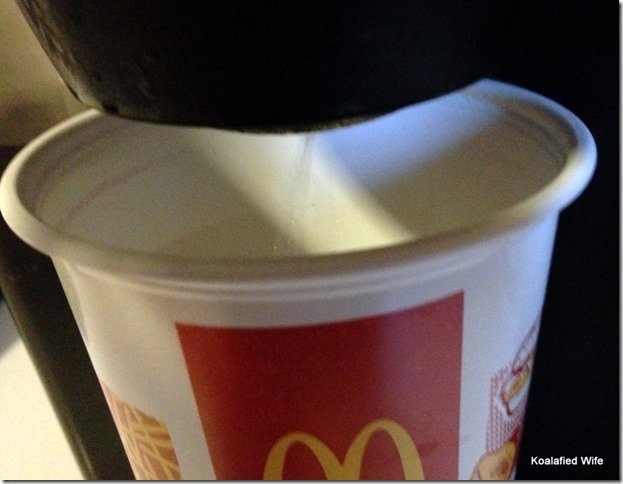
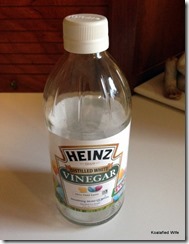
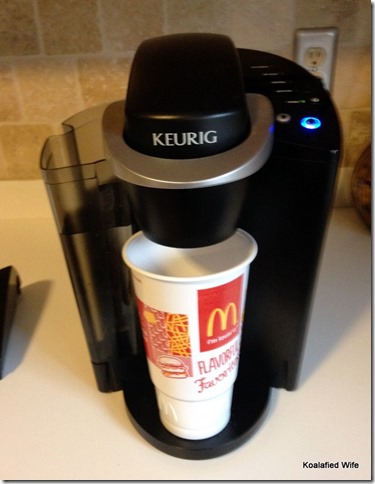
With your reassembled Keurig fill the reservoir tank with white vinegar. I quickly learned after the first cup to put a towel underneath, it was leaking from the bottom because it had gotten so dirty inside. I ran cup after cup of vinegar until the add water light came on, I used a McDonalds cup I could throw away when I was done. The first cup I ran the water was not coming out like I was used to at all, no wonder it was putting out such small cups and the vinegar was gross, it was no longer white and it had dried old coffee in it, it was pretty gross.

Keurig 7

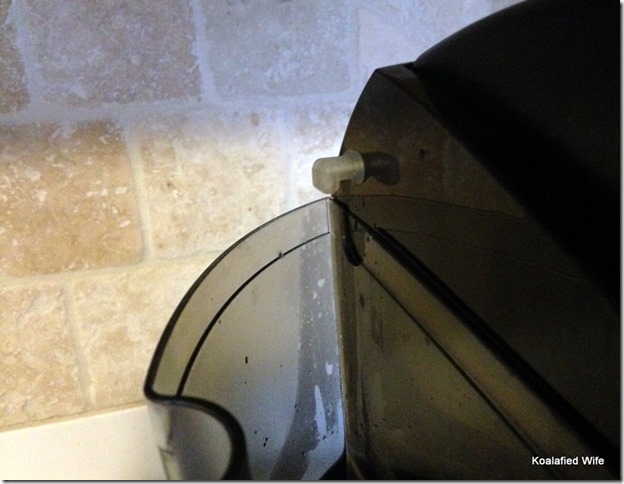
When I ran the first cup I heard water trickling and it wasn’t the water coming from where it was supposed to, it was trickling back into the reservoir tank. Unfortunately I wasn’t fast enough to snap a picture when the vinegar was pouring out of it but the stream was stronger than what was coming out of where it was supposed to. No wonder it was producing such small cups, half the water was refilling the tank.

Keurig 9

The next part is very important, you must, I repeat MUST let it sit for at least four hours, actually let it sit overnight. Why must I let it sit you ask? While it is sitting the vinegar is inside and working its magic, breaking down what has built up inside causing you to get smaller and smaller cups. I tell you what that vinegar really can work some magic!

Keurig 4

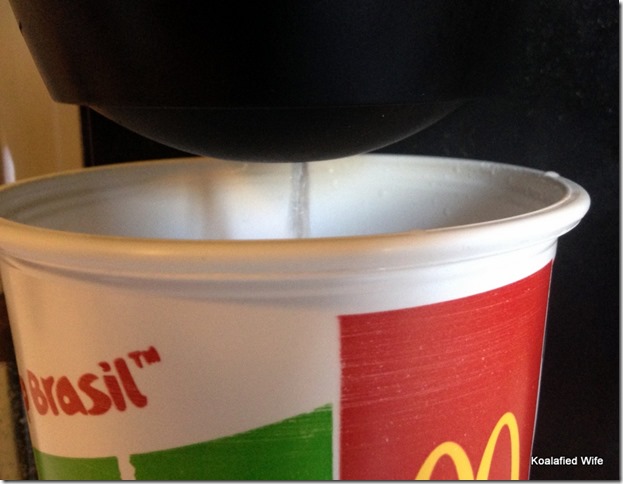
After letting the Keurig sit I completely emptied the reservoir tank, washed it again to get rid of all the vinegar, and refilled it with water. When I ran that first cup I was impressed, it was just like my clean Keurig at home. I actually ran about 5-7 tanks, of water through to flush out the vinegar (I lost count because I just kept refilling the tank and kept running it, I was paranoid that I wasn’t going to get all the vinegar out.) Keurig actually recommends running 2-3 tanks after doing the vinegar but I felt like going overboard, no one would complain if I ran it too many times but they would if I didn’t run it enough.

Keurig 10

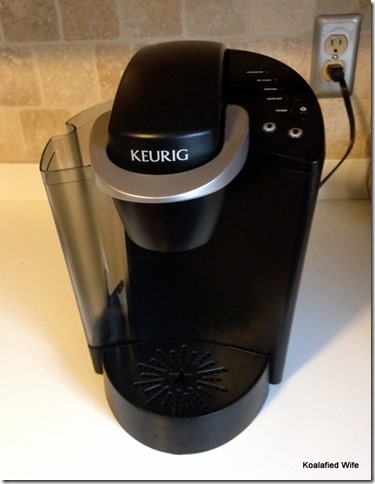
Check out that difference! Well now that we had a freshly cleaned Keurig Zach told me I should take it to work and share it with my coworkers since I had been talking about how nice it would be for the office to have one and how I wished they weren’t so expensive or I would just buy one for us all to share, and the Store had already bought a new one to replace this one since everyone had written it off as broken.

Keurig 5

It felt amazing to bring this Keurig back to life, I really felt like I had accomplished something, and I am continuously surprised at what vinegar can do! I am slightly convinced it can fix any cleaning problem. I used up not only all my vinegar, but also all of Mary’s so we both now own a big jug full, after I went shopping, I am a little excited to experiment more with it!

On another Keurig related note I was just hearing about how awesome the reusable K-Cups are, since I am not a coffee drinker I had kind of written them off but Mary told me that even for tea they are awesome and tea bags are so much cheaper than K-Cups, so I will definitely be investing in one soon, and so should you, if you haven’t already!

Happy Halloween to everyone! I will leave you with a picture of my favorite little monster, my Toews.

2014-10-18 11.55.28

Chai Time!

I may have mentioned before, I am a huge hockey fan, hockey has to be my favorite sport, I LOVE my Blackhawks. Our kitty is even named after my favorite player Jonathan Toews. Well last night we got to go to the Hawks game and sit in a skybox! it was awesome my Toews scored the game winner in overtime, overtime wins are my favorite because I just love how the whole team jumps on the ice to celebrate the goal! We had so much fun and I am so glad hockey season is back!

2014-10-19 19.54.202014-10-19 19.54.23

Recently I have rediscovered my love for Chai, not that I ever forgot, but I discovered the best Chai I think I have ever tried. There is a small café called Shawn’s not far from my work and it is so easy to walk there and get a sandwich or bagel and a yummy drink. During a recent jury trial I was on the hunt for a warm drink to keep me toasty in the freezing cold courtroom I was sitting, that’s the problem with hundred year old courtrooms, the temperature is hard to regulate. Well a few days in I tried the spiced Chai latte at this café and from the first sniff of this drink I was hooked, the spicy smell was amazing and don’t even get me started on the taste, it was smooth and delicious. Long story short, it did a great job of keeping me warm and toasty while I spent hours in this cold courtroom.

After discovering this amazing drink I got to thinking that I really wanted this delicious chai in some other form too, so I turned to my favorite website, you guessed it, Pinterest! I found so many recipes from cookies to cupcakes to cinnamon rolls, let me tell you I am excited to try everything! Finally I decided on cupcakes and I was going to make whipped cream frosting with chai spice mixed in, unfortunately the whipped cream frosting just did not turn out well, as far as frosting, I am adding it to my chai tea at home and eating it by its self, so not to worry although it did not turn out for it’s intended use it was delicious!

Chai Cupcakes 1

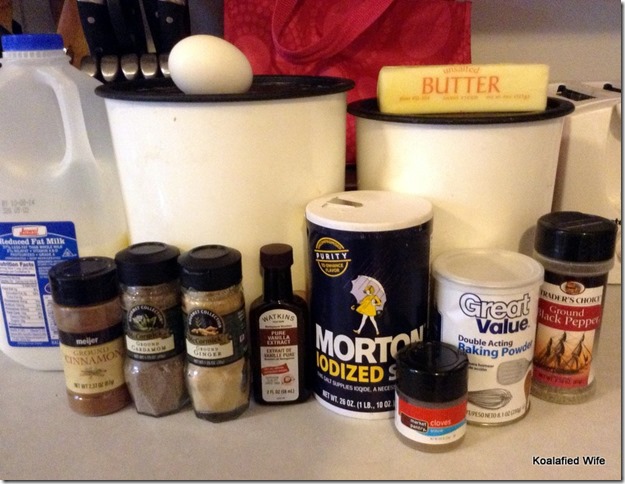
For this recipe you will need ground ginger, cinnamon, cardamon, ground cloves, black pepper, sugar, butter, egg, vanilla, flour, baking powder, salt and milk.

Chai Cupcakes 3

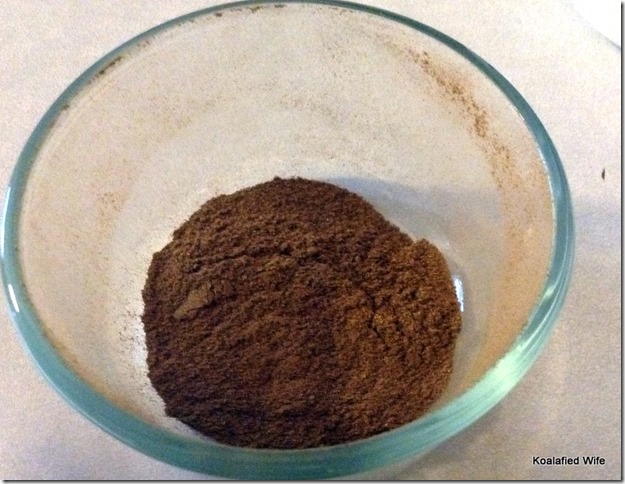
In a small bowl, combine ginger, cinnamon, cardamon,cloves and pepper. Set aside.

Chai Cupcakes 4

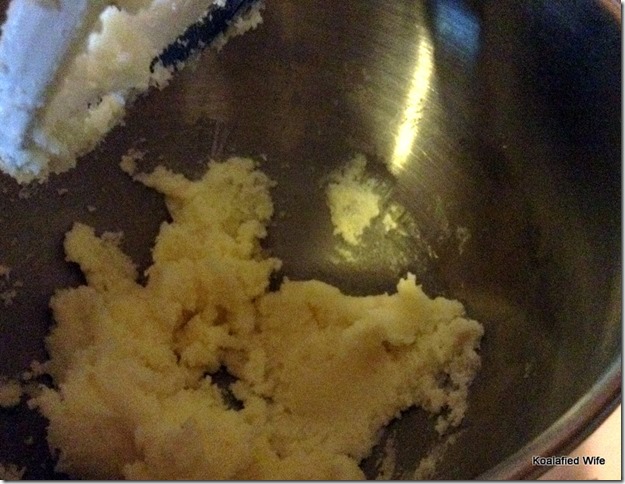
In a large bowl, cream together sugar and butter until light and fluffy.

Chai Cupcakes 5

Beat in egg and vanilla, scraping down the bowl as needed.

Chai Cupcakes 6

In a separate bowl, combine  flour, baking powder, salt and 1 1/2 teaspoons of the spice mixture. Alternate adding the flour mixture and milk to the butter mixture, beating until just combined after each addition.

Chai Cupcakes 8

Fill lined cups 2/3 full. Bake 18-20 minutes or 10 minutes for mini cupcakes, until a tester inserted in the center comes out clean.

Chai Cupcakes 9

Cool for 10 minutes then remove to rack to cool completely.

Chai Cupcakes 10

Frost with your choice of frosting,I recommend adding what is left of the spice mixture to your frosting. I used my favorite buttercream after the whipped cream frosting didn’t work out.

Chai Cupcakes 14

Enjoy!

Spiced Chai Cupcakes

  • 1/2 teaspoon ground ginger
  • 1/2 teaspoon cinnamon
  • 1/2 teaspoon cardamon
  • 1/2 teaspoon ground cloves
  • 1/8 teaspoon black pepper
  • 1 cup sugar
  • 1/2 cup butter, softened
  • 1 egg
  • 1/2 teaspoon vanilla
  • 1 1/2 cups flour
  • 1/2 teaspoons baking powder
  • 1/4 teaspoon salt
  • 2/3 cup milk

Preheat oven to 350. Line muffin cups.

In a small bowl, combine ginger, cinnamon, cardamon, cloves and pepper. Set aside.

In a large bowl, cream together butter and sugar until light and fluffy. beat in egg and vanilla, scraping down the bowl as needed.

In another bowl, combine flour, baking powder, salt and 1 1/2 teaspoons of spice mixture. Alternate adding the flour mixture and milk to butter mixture, beating until just combined after each addition.

Fill prepared cups 2/3 full. Bake 18-20 minutes or 10 minutes for mini cupcakes, until tester insterted in the center comes out clean. Cool for 10 minutes then remove to rack to cool completely.

Chai Whipped Cream “Frosting”

  • 4oz. cream cheese, softened
  • 1/4 cup sugar
  • 1 teaspoon vanilla
  • 3/4 cup + 1 tablespoon heavy whipping cream
  • Remaining spice mixture (about 1/2 teaspoon)

Whip the cream cheese and sugar together until well combined. add vanilla extract and whip for a few seconds. Slowly add the cream and beat until stiff peaks form. Taste and add a little more cream if needed.

Like I said my attempt did not turn out well for frosting but tasted fantastic on its own or added to my chai latte at home.

On a side note a big congrats to my favorite football player Peyton Manning on setting the all time touchdown record tonight, in the words of Brett Favre On to 600!

I will leave you with a picture of my other favorite kitty…Steeger! (He is Zach’s parents’ cat, also named after a Blackhawks player.) He was not impressed with the Bears game.

2014-10-19 13.40.43

A Sprinkle of Love

Today is a special day, it is my mother in law Mary’s birthday! For months I have known that I would be making something for her and featuring it on my blog but I have had such a hard time deciding what to make for her special day. A few months ago she gave me a challenge to make that I was originally going to make, but I changed my mind, I will make it before the end of the year, I promise!

0112

Mary is one of my biggest supporters, not only did she make my fabulous banner you see at the top of this page, as a fellow blogger it has been great to bounce ideas off her, we even have a few projects in the works to be featured on here so stay tuned! This weekend is her class reunion and it really got me thinking because, ten years ago I was invited to the family picnic part of the reunion since I was her son’s girlfriend of almost a year. We have almost eleven years of memories and I am so grateful that Mary welcomed me into her family with open arms from day one.

Well this past weekend when I was in my baking mood I texted my trusty taster (Mary) asking what cookies I should make, when she replied with frosted sugar cookies, I knew I had a winner for her birthday, especially since I had just some across and intriguing recipe on Pinterest that morning. When I posted my puppy chow post I asked what your favorite treats were as a kid Mary mentioned sugar cookies and how she would make them with her mom at Christmas, so I wanted to make them a little different than her fantastic Christmas sugar cookies, seriously they are one of my two favorite sugar cookies, the other is my co-worker Sue’s, my mouth is watering just thinking of all these cookies! Well now I have a third favorite to add to theirs!

Fluffy Sugar Cookies 3

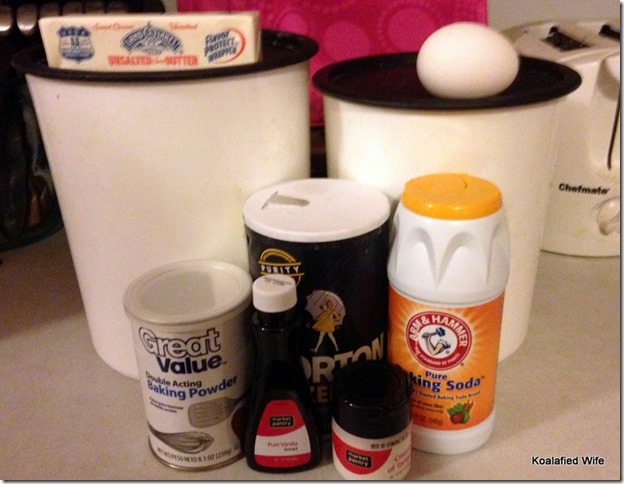
For the cookies you will need butter, sugar, egg, vanilla, flour, baking powder, baking soda, cream of tartar and salt.

Fluffy Sugar Cookies 5

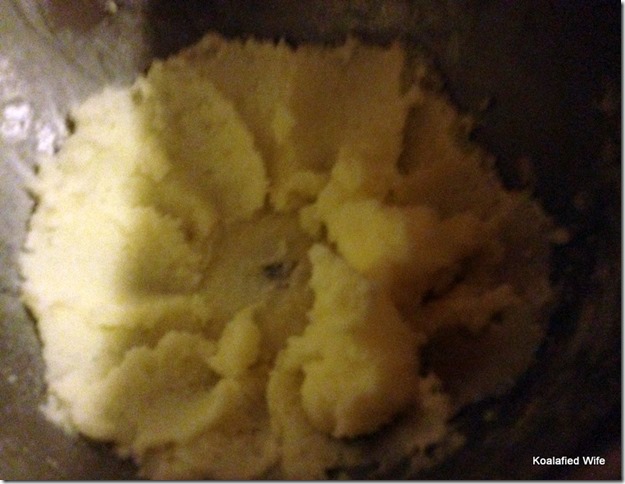
Beat together butter and sugar on low until light and fluffy, about 2-3 minutes.

Fluffy Sugar Cookies 7

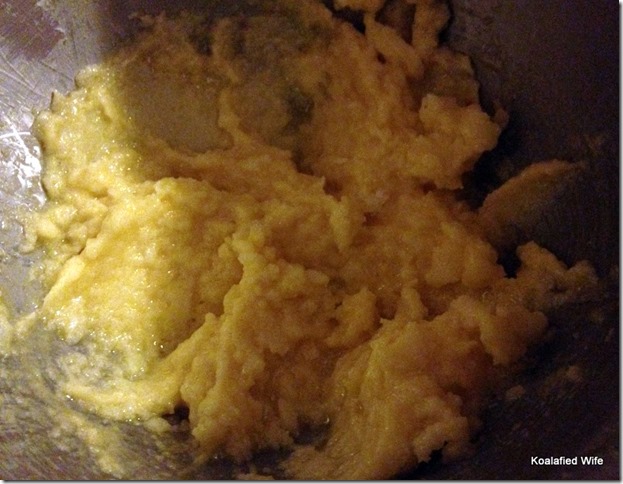
Beat in egg and vanilla.

Fluffy Sugar Cookies 8

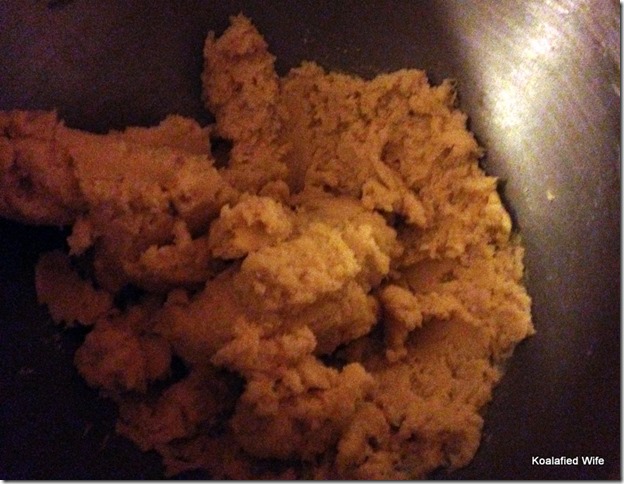
Gently fold in flour, baking powder, baking soda, cream of tartar and salt.

Fluffy Sugar Cookies 13

Scoop out dough with medium scoop and refrigerate at least 2 hours. (I let it sit overnight in an air tight container in the refrigerator.)

Fluffy Sugar Cookies 15

When you are ready to bake preheat oven to 350 and put cookies from the fridge on baking sheets.

Fluffy Sugar Cookies 20

Bake 10-12 minutes. Remove from oven and cool completely on baking sheets before removing.

Sugar cookie frosting 1

While the cookies are baking it is time to make the frosting! You will need butter, powdered sugar, vanilla and heavy cream. Oh and don’t forget the sprinkles!

Sugar cookie frosting 4

Beat butter on low speed until light and fluffy.

Sugar cookie frosting 5

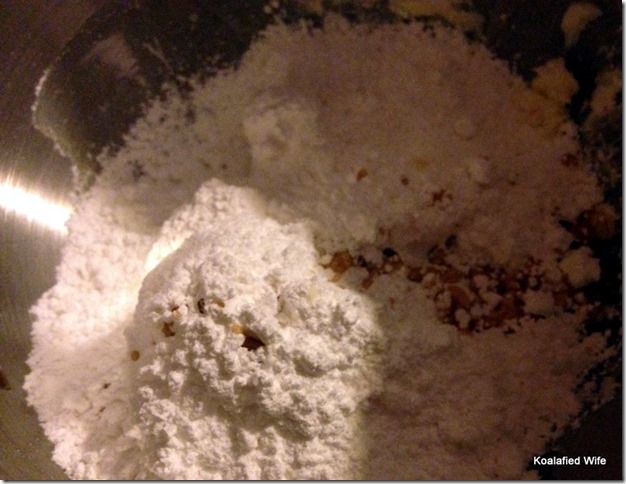
Gently mix in powdered sugar and vanilla.

Sugar cookie frosting 6

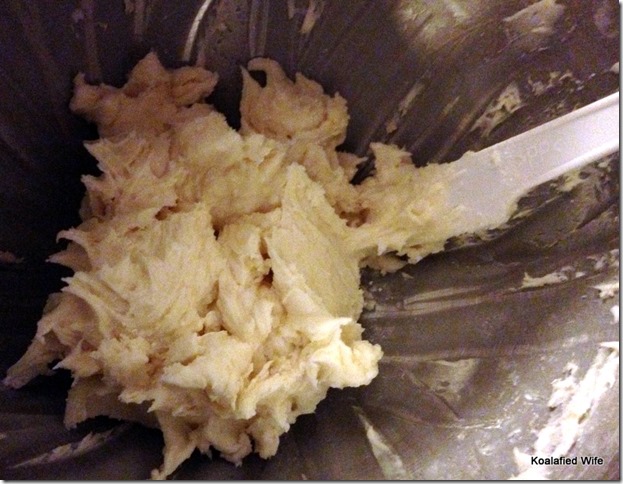
Pour a tablespoon of heavy cream at a time, beating until you reach desired consistency. (I used all three tablespoons.)

Frosted Sugar Cookies 1

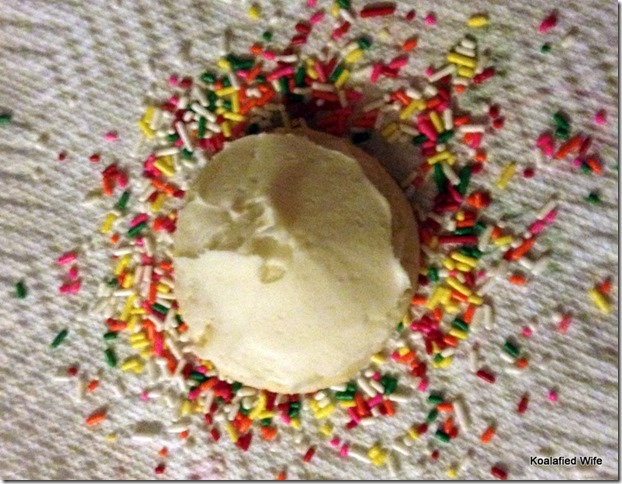
Now the fun part! Frost the cookies as desired.

Frosted Sugar Cookies 2

Cover with sprinkles.

Frosted Sugar Cookies 5

Share! (They are also delicious unfrosted!)

Frosted Sugar Cookies

For the Cookie:

  • 1/2 cup butter, softened
  • 3/4 cup sugar
  • 1 egg
  • 1 teaspoon vanilla
  • 1 1/2 cup flour
  • 1 teaspoon baking powder
  • 1/2 teaspoon baking soda
  • 1 teaspoon cream of tartar
  • 1/4 teaspoon salt

In a mixing bowl add butter and sugar, beat on low until light and fluffy, about 2-3 minutes. Beat in egg and vanilla, scrape sides of the bowl with a spatula. Gently fold in flour, baking powder, baking soda, cream of tartar and salt. Scoop out dough using a medium scoop and refrigerate at least two hours, I recommend overnight. (Do Not skip refrigerating the dough, your cookies will not turn out the same!)

When ready to bake preheat oven to 350, place chilled dough onto baking sheets and bake 10-12 minutes. Remove from oven and cool completely on baking sheets before removing.

For the Frosting

  • 6 tablespoons butter, softened
  • 2 1/2 cups powdered sugar
  • 1 teaspoon vanilla
  • 2-3 tablespoons heavy cream

Add butter to mixing bowl, beat on low until light and fluffy. Gently mix in powdered sugar and vanilla. Add heavy cream a tablespoon at a time to reach desired consistency.

Spread about a tablespoon of frosting over each cookie and decorate with colorful sprinkles.

Frosted Sugar Cookies 4

Look at how yummy those look!

Happy Birthday to the best mother in law!